Pages

Wednesday, November 30, 2011

Spring Onion Dal

Hi Friends ,
There is a slight change in the event announcement page.Please check that out and do send in the recipes,dearies.
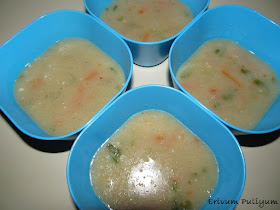
Coming back to today's recipe -Spring Onion Dal .Who doesn't like dal?? I love it a lot so goes with my kidoos..A rich pack of protein and a healthy treat.Sometimes I even squeeze few drops of lemon on top of dal in the platter,slurp !! Dal can be made plain and can be made along with some veggies or green leafy vegetables.I usually prepare the dal curry with masoor or split moong dal and its invariably a combo with spinach leaves.But for a change,I tried it with spring onions and this turned out very good..A very simple recipe yet a healthy one!!


Ingredients
split moong dal 1/2 cup
spring onion(with stalk n bulb discard the roots)- 12 chopped
garlic 3 cloves sliced
turmeric powder 1/2 tsp
chilly powder 1/2 tsp
asafoetida a pinch
salt
For tempering
mustard seeds 1/2 tsp
dry red chilli 3
Curry leaves
oil 2tsp


Method
- Wash and clean the dal .put it in a pressure cooker along with spring onions,sliced garlic,turmeric powder,asafoetida,chilly powder and salt.
-Cook for 2 whistles and put off flame.Wait till pressure is released.
-Heat oil in a pan and splutter mustard seeds,dry red chillies and curryleaves.Add into the dal and serve hot.

Servings 4 adults


Sending this to Herbs and Flowers- Spring Onion event hosted by Kaveri @ Palakkad Chamayal


Sending this to Only -Curries hosted by Pari @ Foodelicious


Sending this to Healthy Cooking Challenge - Lunch hosted by Kavi @ Edible Entertainment


Monday, November 28, 2011

Baked Bird's Nest (Noodle Fritters) and Awards !!!!

Baked Bird's nest very cute name for a very healthy snack ..delicious and another hit among kids who love savory tastes.If you have left over prepared noodles the next day and you find noone is interested in it then this recipe is the right choice.This recipe is bookmarked from Amy @ Food Corner.The recipe ingredients are very easy and readily available at all times.I added fine grated carrots,you can add any veggies of your choice.But try to make it colourful as kids get carried away with the colour  :-)


Ingredients
Prepared noodles (refer here ) 3 cups
egg 1 beaten
pepper powder 1 tsp
carrot 1 grated small
salt 1/2 tsp


Method
- Whisk the egg and add salt ,pepper.
- Mix it with the prepared noodles.
- Pre heat oven to 350 degrees F and line baking cups in the muffin tray after spraying oil.
- Spoon the mix into each cup and then add the grated carrots on top.
- Place it in the oven in the middle position (I had placed it in the top most rack and so the sides have browned a bit )and bake for 20-25minutes.
- Cool for 10 minutes and serve the bird's nest with tomato ketchup or JLT !!

Notes
* You can add any veggies of your choice.But the more colourful and it will be kids favourite.


Christy @ My Kitchen Flavors -Bon Appetit has a wonderful space with very innovative recipes and a very regular blogger too.I love her sincerity towards her space and a very hard working person in terms of cooking.She has shared the following awards with me -


and I would like to pass it to the following bloggers-

1.Ambreen @ Simple Sweet n Savory
2.Nalini @ Nalini's kitchen
3.Anisha @ Flavours
4.Vineetha @ Ruchi
5.Neetz @ Kitchen Express
6.Kaveri @ Palakkad Chamayal
7.Teena @ Teenz Yummly Delights
8.Faseela @ Good Food Ends with Good Talk
9.Lizy @ Hot n Steamy Food
10.Prathiba @ Cook- Ezee
11.Amina @ Amina's Creations
12.Amy @ Food Corner
13.Sumee @ Sumee's Culinary Bites
14.Anzz @ Anzzcafe
15.Shema @ Life Scoops


Teena @ Teenz Yummly Delights and Anzz @ Anzzcafe share The Liebster Blog Award with me.Thank you Friends for the lovely thought of sharing it with me.Both of them have a lovely space and have good collection of recipes.Do visit their space too.

'Liebster'means favourite  or dearest in German.In accepting the award,the recipient agrres to :
- Thank the person that gave the award and link back to their blog.
-Copy and paste the award to your blog.
-Reveal the 5 blogs you have chosen to award and let them know by commenting on their blog.
-Hope they pass it forward by accepting and awarding it to bloggers they would like to honour.
I would like to pass it to the following  bloggers-
1.Aipi @ US Masala
2.Princy @ Spicyfoood
3.Raksha @ Raksha's Kitchen
4.Sandhya@ Sensible Vegetarian
5.Neha@ From My Heart

So,Friends grab them up and paste it to your space and feel honoured. Happy Blogging!!!!

Saturday, November 26, 2011

Cranberry Upside Down Muffins (Thanksgiving Delight)

Hope all my US friends and readers had a great Thanksgiving and shopping ..We too had a great day,busy shopping..kids had lots of fun and the weather was extremely good today !!Cranberries are part of thanksgiving season and so thought to post this recipe (better late than never :-)).An easy muffins but with a different texture and perfectly loved ones with kids.My kids loved its juicy texture and the muffin beneath.

Recipe source :Joy of Baking


Ingredients
muffin batter
all purpose flour 2 cups
white sugar 1/2 cup
milk 1 cup
egg 1 lightly beaten
vanilla extract 1 tsp
unsalted butter 4 tbsp melted and cooled
dried cranberries 1/4 tsp(not in original recipe)
baking powder 2 tsp
salt 1/2 tsp

Cranberry sauce  1 cup


Method

  • In a large mixing bowl,mix all the dry ingredients.
  • Prepare the cranberry sauce and cool it down or use the ready made ones from store.Refer this for preparation ,only thing is use 1 table spoon of water to make it thick and syrupy.So reduce the amount of water.(I made a little watery so it just overflowed)
  • Preheat oven to 400 degrees F and place rack in the middle position.
  • Add the egg and milk mix into the flour and mix.Donot over mix otherwise cake will be tough.
  • Divide the cranberry mixture equally into 12 muffin cups greased with oil.
  • Spoon the dough into each cup thereafter  and bake it in the oven for 15-20 minutes until very lightly browned.
  • Cool on wire rack for 2 minutes.
  • Then invert into serving plate and remove liners.
Servings 12 muffins

NOTES
*The consistency of cranberry sauce is important ,It should be thick and syrupy.

Happy Weekend to All !!


Thursday, November 24, 2011

Chicken Carrot Coconut milk - 3 C's Soup

Happy Thanksgiving to all my friends,in advance !!

Winter or the drizzling rain is the perfect time to sip a bowl of soup to keep you warm and cozy!!Lying comfortably on the couch with a plush or blanket watching TV  and a sipping cup of hot tea or soup makes you real warmer..oh!! the thoughts itself gave me a thermal touch.. all fantasies apart,now adays I hardly find time for watching TV.The soup is also a better way to soothe your throat,Have anyone observed this? After a day's tiring work in the evening sipping soup,the throat feels relaxed.The usual trend for my soup goes with addition of corn starch but this time for a change I had to feed my kidoos to ease their throat (both had cold) and they don't drink it if its more spicy..so I just added the coconut milk at the end and it did wonders.The whole taste of the soup changed,and all liked it  a lot and the rest is in pictures :-)

Click here for more soup recipes.


Ingredients
chicken 250 gms boneless cut thin stripes
carrot 1 cut thin stripes
cilantro 4 sprigs
corn flour 2tbsp
coconut milk 1/2 cup thick
pepper powder 3/4 tsp
salt as required
water 4 cups


Method
Cut and wash the chicken under running water.Drain the excess water and keep aside.
Boil 3 1/2 cups of water in a pan and add in the chicken pieces.Add in the salt and pepper powder required to cook the chicken.
Cook on medium heat for 12- 15 minutes.Add in the chopped carrots,cilantro.Cook for another 5-7minutes.
Mix the corn flour in a little cold water and add to the boiling mix.
The soup will thicken now,adjust salt.Put off the flame.
Prepare the coconut milk and just add to the hot soup.Serve it hot !!


NOTES
- Donot add coconut milk into the boiling soup,wait a while then add when it is still hot.(otherwise it may curdle up)
-I used the maggi coconut milk powder ,you can use the canned ones too,then adjust the amount of water accordingly.


Enjoy this yummy soup after the heavy and tiring lunch on Thanksgiving !!

Tuesday, November 22, 2011

Low Fat Banana Bread (Wheat flour,butterless)

Low fat banana bread the name itself attracted me towards this recipe as there was no butter ,only egg whites no yolk.Nothing much has to be told about this recipe, a very simple and tasty bread.The original recipe used 3/4th of all purpose flour and 1/4 th of wheat flour.But I completely gave it up for wheat flour and as I had tried the Banana Cashew Cake with wheat flour too.The recipe sounded very good for dieters.I have made few changes to the original recipe.All loved each slice of the bread :-) and its easy for working moms to prepare this in advance and serve two slices for breakfast with a cup of milk.


Ingredients
bananas ripe 2 mashed makes about 1 cup
plain yogurt 1/2 cup (low fat preferably)
vegetable oil 1/4 cup
*light brown sugar 3/4 cup
Egg white of  2 eggs
vanilla extract 1 tsp
*wheat flour 1 1/2 cup
cinnamon powder 1/2 tsp
*raisins 1/4 cup
baking powder 1 tsp
baking soda 1/2 tsp
salt 1/4 tsp


Method
Blend the bananas in a blender and add in the yogurt ,baking soda and let it sit for a while you prepare the batter.
Pre heat oven to 350 degrees F and place the rack in the middle position.
In another bowl ,whisk together oil,sugar,egg whites and vanilla.
Sift the flour with baking powder,baking soda and salt.
Fold in the wet ingredients to the dry ingredients.until its moistened.Add in the raisins.
Grease a bread loaf pan and pour into it .Smooth the top with spatula.
Bake it in the oven for 45-55 minutes .Mine was done at 45 minutes.Insert a tooth pick and see if its done.
Remove from oven and cool on wire rack.Cut into slices aftyer cooling and Serve as breakfast or snack.


NOTES
* You can replace wheat flour with 3/4 th all purpose flour and 1/4 th wheat flour.
*I used white sugar butr the original recipe is light brown sugar.
* The raisins are optional not in the original recipe,I just added as my kids love it.
* You can try a total eggless version too,omitting the egg whites.


Sending this to Breakfast club Theme -Bread guest hosted by Krithi's Kitchen


Also,sending this to Bake with your heart event hosted by Khusi @ A Girl's Diary 

Monday, November 21, 2011

Chammanthi Podi / Roasted Coconut Chutney powder(Mom's Recipe)

Chammanthi podi /Roasted coconut chutney powder is a dry version of chutneys famous throughout Kerala.This is a very spicy,tangy, flavorful combination that can be served with plain rice during travel or with kanji (rice porridge). I love this combination with thick yogurt and plain rice. I still remember the days when we used to travel from Kerala to Delhi and back, mom used to carry the small packet of this podi. The first day of meal  will be served in wilted plantain leaves with freshly ground coconut chutney, parboiled rice, stir fry and so on. As on the second day the fresh food (esp in summers) doesn't remain fresh and so comes my mom's cherished packet of chammanthi podi to be served with lemon rice / tamarind rice. We always loved long train journeys just for the sake of dining every year. The taste still brings back nostalgic memories :-)


This post is staying in my drafts for months now. When I visited Kerala couple of months back, I bought with me a packet of my mother's home made chamanthi podi and only now did I remember to take a picture of it when the majority part had finished. The full credit of this recipe goes to my mom and I just kept the recipe for my future use. Thus, thought to share with you all.
Now, I have been making my own batch of chammanthi podi and kids too love this. This time I prepared the video on this recipe which is shared below, check it out.

Please check out, Unakka Chemmeen Chammanthi Podi too.


Preparation time ~ 20 minutes
Cooking time ~ 30-40 minutes
Author ~ Julie
Serves ~ 3 cups 
Ingredients
coconut 1 grated (2.5 cups)
shallots 4-5
ginger 1.5' shredded
fenugreek 1/4 tsp
whole pepper corns 1 tsp
coriander seeds 1tbsp
red dried chilly 10
tamarind 1 lemon size (or as required)
salt as necessary
curry leaves

Watch on YouTube


Method
  • Roast the coconut without oil, add in the shallots, curry leaves and cut ginger. Dry roast till the water contents evaporated and roast coconut till golden brown. I generally pulse the grated coconut in mixer jar twice foe getting even strands which makes the work easier to roast evenly which is an optional step.(may take 25-30 minutes on medium flame).

  • Warm up the red dried chilly and coriander seeds, fenugreek ,peppercorns in another pan for 3-4 moinutes and keep aside.
  • Add the spices first in the grinder or the mortar and pestle. Grind it fine.(Don't add any water) This is my mom's step of using but I use the mixer and so first pulse the coconut and then roast coconut which makes the work easier. Add salt, mix well
  • Finally add the pitted tamarind in each batch of coconut and then grind.
  • Chammanthi podi is ready to serve with plain rice and thick yogurt !!


Notes 
* The grinding in mortar and pestle is more tastier than the blender one.My mom prefers that and in a blender the coconut starts leaving oil when you grind and  it sticks to the blades.
*This podi/ powder can be stored in ziplock bags in refrigerator for months.
* This powder can be used for packing lunch box for kids.
* Also this powder when mixed with a tsp of coconut oil ,can be used to serve with idlis/ dosas .
* I usually make large batches of 4-6 coconuts and so the making shows such a pic,I have listed the ingredients for a very small batch.Double or triple the quantity and you can make larger batches.


Sending this to The Kerala kitchen event hosted by Fajeeda @ Faji's Hot Pot 


Friday, November 18, 2011

Paal Appam(Paal Pathiri) | Appam with coconut milk & Chicken Curry

Paalappams (crepes) usually refer to the appams of Kerala speciality which are made using coconut milk and rice flour fermented using yeast.And the traditional paalappams are done in the appachatti or a wok or a nonstick kadai with a depth so that once you pour a ladle of batter into it you can swirl it around and it forms  beautiful laces.Paalappam in the literal meaning means appams made using coconut milk and so I named this recipe to as paal appam(paal pathiri).Unlike the traditional one, this is quite an easy way of preparing appams using all purpose flour and no grinding ,no fermentation required.The recipe credit goes to my friend,Saleena.She told me the recipe and I just tried this out and we loved it.I didn't have an  appachatti so I prepared in a simple non stick frying pan just like I prepare dosas.These are melt in mouth soft appams which you keep on nibbling without even knowing the numbers with the perfect non veg combo!!

Related Post : Laced Rice Pancakes | Traditional Paalappam


Ingredients
For paal appam/paal pathiri
all purpose flour/maida  1 1/2 cups
egg 1
salt as required
coconut milk thick 1/2 cup
baking soda a pinch


for Chicken curry
chicken boneless or with bones 1 lb
onion 2 1/2 medium sized sliced
tomato 2 chopped
ginger garlic paste 1 tsp each
cilantro 3-4 sprigs chopped
chilly powder 1 1/2 tsp
coriander powder 1 1/2 tsp
garam masala / chicken masala 1 tsp
pepper powder 1/2 tsp
coconut milk 1/3 cup thick (optional)
salt
oil 3 tsp


Method
FOR PALLAPPAMS-
-Lightly beat in the egg and Prepare a batter using the listed ingredients for pallappam.The batter should be thin enough so that it can be swirled around in the *appachatti (refer notes) or the non stick pan .
-Heat an appachatti or a non stick pan on mdium heat,pour a ladle of batter and swirl it round as thin as possible .(Do it as soon as possible as unlike other appams this has eggs and so sticks faster to the pan.)
-Flip both sides till light brown and its done.Repeat for other appams.Serve it hot!!


FOR CHICKEN CURRY-
-Wash and clean the chicken pieces.Drain the excess water ,keep aside.Marinate using half of the spice powders ,salt except garam masala  for 2 hours.
-Heat oil in a kadai and saute the onion till golden brown,add in the tomatoes.
-Add in the ginger garlic paste.
-Add the spice powders on low flame and  put the chicken pieces.
-Cover and cook for 15 minutes.
-Uncover the lid ,check salt and spice powders.Wait till the gravy thicken aropund 10 minutes.
-Garnish with cilantro and add in coconut milk if its spicy or the gravy is too thin.
-Serve hot with pallappams!!


Notes
* You can replace the all purpose flour with wheat flour  if you are very much health conscious, but it may not be very thin and so soft.
* If you prepare it in a non stick kadai or appachatti ,you can appreciate the laces and more softer too.
* You can do these in the nonstick pan but make sure you more just like for masala dosas thin.

Sending this to The Kerala Kitchen event hosted by Fajeeda @ Faji's Hot Pot


Wednesday, November 16, 2011

Vanilla Bars (Vanilla cake with a Twist,vanilla wafers,ricotta cheese &)

A strange recipe name,Isn't it ??I too wondered for a while to name the recipe but then this is the only name that striked me appropriate to it.This recipe was a real experimentation and am happy that it came out well;no references,no clues.I had 2 packets of vanilla wafers with me and kids had rejected them at the very sight.I planned to be their tricky mother and incorporated this into the bars..Poor kids !! just believed that there was an interesting item in front of them with a new name and a new recipe, of course:-))

 
Note the thin layer of vanilla wafer and cheese

Kids grabbed each bit of it and demanded for more.Its very easy to play tricks with them and I was happy not only to feed them  but also that it came out very well to share with all ..


Ingredients
vanilla wafers 6 oz(170g)
ricotta cheese 7.5oz(200g)
all purpose flour - 1cup
sugar -1 cup
eggs- 2
butter -1 stick(1/2 cup) 125g
baking powder 1 tsp
vanilla extract 1 tsp
salt a pinch


  Method
  • Pre heat oven to 375degrees F and line a tray with parchment paper .
  • Crush the vanilla wafers and mix the ricotta cheese into it and make a crumpled dough.Flatten it into a baking tray .Use the offset spatula or a flat spoon to make the layer even and flat.
  • Bake it in the oven for 15minutes.
  • In the meantime ,You can either use half of a vanilla cake mix OR you can do it from scratch as I did.
  • Sift the flour,mix the baking powder and salt.Blend the eggs,add in the melted butter,vanilla essence and sugar.
  • Fold in the flour and make a cake batter.
  • After 15 minutes,reduce temperature to 350 degrees F and remove the tray ,pour the cake batter on top and bake again for 30 - 35 minutes.
  • Cool on wire rack once bar is done.Cut into desired shapes and sizes.
Notes
* The bars were slightly thicker ,so you can reduce the cake batter mix ratio for a thinner bar.


Sending this to Food contest of the month - Christmas event hosted by  Amy @ Food Corner


Also, Sending this to Christmas Delicacy  event at my space


Tuesday, November 15, 2011

Duplicate Pop Corn Chicken ( Less Coating,More Chicken )

Pop corn chicken,is a recipe all of us like whenever we are eating out !!But many a time I always hold myself not to eat it more as this is all fatty and junk foods ;however kids donot understand this and they always persuade us to buy and they are always fascinated by these...The other day when I was just browsing through there were many websites giving the original recipe but that was all heavy coating of bread crumbs and oil.Then I found one recipe which fitted evenly to my kind a recipe -less coating and more chicken.The recipe clearly explains it that she got a packet from KFC and demonstrated the amount of coating on it and the ones she fried with less of it.You can add spices and herbs as per your convenience and availability.I was very impressed by the recipe and so thought to try this out.It came out good and it should be eaten hot.All liked in the family too :-)

Recipe Source :You Tube


Ingredients
boneless chicken 250g cut preferably squares
wheat flour /all purpose flour 1 cup(I used wheat flour)
ginger garlic fine paste 1 tsp
chilly powder 1/2 tsp
pepper powder 1/2 tsp
salt as required
oil for frying


Method
Wash and clean the chicken,Cut squares(I just cut roughly).Pat it dry on a paper towel.
Marinate the chicken using the spice mix and salt.Keep for 2 hours in the refrigerator.
Take the wheat flour in a ziploc bag and add 8 pieces of chicken into it.
Shake it and let it coat upon the chicken pieces.Repeat the step for other pieces.
Heat oil in a kadai and deep fry the pieces after shaking off the excess flour.
Place on a paper towel.You will see a thin coating but tastes like pop corn chicken.
Serve hot with ketchup!!!!!!!

Note
* You can modify the herbs n spices as per your taste.

NOTES
*You have to serve it hot other wise you loose the crispiness as there is very less coating on it.

Monday, November 14, 2011

Announcing My First Blog Event - Christmas Delicacy !!!!!

Hi Friends,
Iam happy to announce my first blog event and am all excited about it.I have chosen Christmas as the theme, as I wait for the month of December from the beginning of the year.This month brings about all celebrations to invite Christmas and the forthcoming year as well.Preparations have already begun to invite the Thanks giving thereafter to welcome Christmas too.There are many recipes in relation to christmas time esp  the cakes ,cookies and wine.Not only the sweet cakes all savories too...Its a festive time and holiday season coming up .So,Don't forget the event at my space,dearies and all this is possible only with your yummy recipes,Friends!!


All You have to do is-

  • Post a recipe in your blog from Nov' 15 -Dec '31 2011.
  • Bloggers and Non-bloggers can participate in the event.
  • Old Entries that are reposted during the event schedule dates are allowed.
  • Both Vegetarian and Non vegeatarian recipes are allowed.(No pork,No liquor please that excludes home made wines)
  • The recipe can vary from curries,rice,cakes/breads,cookies,snacks,tarts,pies,puddings,home made wines n anything that fits into the festive mood.(sweet and savory)
  • You must link your posts to this event announcement page.
  • I would appreciate if you use the above logo in your post as it helps to spread the event info.
Send me your recipes to julstreat@gmail.com with the subject Christmas Delicacy and the following details-
1.Your Name :
2.Blog's name:
3.Blog's URL :
4.Recipe Name :
5.Recipe URL:
6.Pic of the dish :

So ,Whats more pals..Don't forget the event and Rush in your entries before the last day of the year and make this a memorable one!!

NOTES
* I have edited the no liquor part as all home made wines contain some percentage of alcohol.Now,all can send in their favourite wine recipes as well..

Friday, November 11, 2011

Nutella Palmiers (2 ingredient;Sweet cookies from Puff Pastry Sheet)

The word 'Palmier' may sound weird and complicated but the recipe sounds very simple and kids will definitely love them.Easy to prepare for a small kitty party for kidoos and am sure you will be the limelight.The word 'palmier in french means palm trees ;the shape of these cookies resemble that of palm leaves.Originally these palmiers adopted the middle eastern influence of layering thin sheets of pastry and filling sweets and spices(baklava) but some say it originated from Vienna ..the debate goes on .Anyway thats not part of the recipe and we should be bothered to grab these melt in mouth cookies,right :-)


Elegant puff pastry sheet cookies have become our favourite cookies.It feels so fancy to line them n the tray and so crispy and buttery feel..can't put in words!!These cookies are made by rolling a the puff pastry sheets towards the centre  from both sides and cutting them into 1/3 inch thick.This recipe requires complete thawing of pastry sheet ,otherwise the folding may not be appropriate.


Ingredients
puff pastry sheet 1
nutella 5-6 tsp (thin layering the sheet)
Sugar to dust


Method
Thaw the puff pastry sheet completely on a parchment paper.Spread it like a sheet and apply thin layer of nutella all over one side.Start rolling tightly from one side and reach the centre ,repeat the same n the other side until you reach the centre.Cover it with a cling/plastic wrap and refrigerate for 20 minutes.Pre heat oven to 425 degrees F and place rack in the middle of the oven .Uncover the pastry sheet after 20 minutes and start cutting in 1/3 -1/2 inch thickness.

Lined up in the tray for baking

Place it on a baking sheet with parchment paper with 2 inches expansion room and then press slightly with the back of a cup on each cookie so that it flattens slightly.Brush with melted butter and dust sugar on top.Place it in the oven and bake for 18-20 minutes until golden brown and cool for 10 minutes on cookie sheet and then transfer on wire rack to complete cooling.Serve or store in air tight containers.

NOTES
* You can use brown sugar,Cinnamon and sugar,citrus zest and sugar,or finely shredded cheese fr a savory twist.
*You may feel the cookies less crisp the second day but tastes delicious.