Pages

Tuesday, February 26, 2019

Idiyappam Upma ~ Quick Healthy Snack

There are many around the world who don't even get a one full meal. I always remind my kids about the immense shower of His blessings upon us. I don't like wasting food at any cost and I don't like the buffet system in hotels/ restaurants too. The wide range of food items displayed in the buffet and what do you think they do with the leftovers in these class hotels. Do they give this to the needy or just dump off ? I have heard a few restaurants who give it away to the hospital caregivers and others in need. But that's just the tip of the iceberg and the others in each city counts to n numbers. Secondly, the amount of food people devour in the name of 'unlimited' is like putting your own health at risk which I feel is another stupidity. Do you also feel the same ? It's always better to make limited food to make sure we aren't wasting any may that be home or hotels. Also, if at all you end up making more, then it's better to recreate something more tasty and healthy.

Watch YouTube #shorts on this recipe here.


Back home, I make use of all leftovers in one or the different form to just make sure it's better than the packed junk and also to feel good that am not wasting any food. Kids always need something filling when they are back from school. So most of the breakfast recipes are recreated to make a new dish with the leftovers. I have seen my kids totally enjoying the new item. Left over idlis gets converted to idli upmabaked idli snack, left over dosa batter to kuzhi paniyarampunugulu, left over rice as crispy rice balls, left over idiyappam dough as kozhukattaammini kozhukatta or peechappam, left over bread as bread upmabread pakoras, left over dhokla as Amiri khaman. The same goes with the left over idiyappam which can be made into upma and can be enjoyed by garnishing with a little homemade sev or crunchy kerala mixture. Do give any of the recreated breakfast items a try and let me know too.


Preparation time ~10 minutes
Cooking time ~ 10 minutes
Serves ~ 4 
Author ~ Julie
Ingredients
idiyappam / string hoppers 10

to temper
mustard seeds 1/2 tsp
cashews broken 1 tbsp
onion 1 medium chopped
ginger chopped 1 tbsp
green chillies 2 chopped
curry leaves 1 sprig
carrot grated 1 medium size (optional)
green peas 2 tbsp (optional)
coconut oil 3 tbsp
*grated coconut 1/3 cup
lemon juice 2 tsp
salt to taste

to garnish
kerala mixture / homemade sev 3 tbsp


Method

  • Crumble the left over idiyappams and keep aside.(Learn how to make idiyappams in this link here).
  • Heat oil in a pan and splutter mustard seeds. Add in the chopped onion, curry leaves, green chillies. Sauté until translucent and then slide in the chopped ginger and green chillies. Sauté until the raw smell disappears.
  • Add the green peas and grated carrots. Add salt as needed and cook covered for 2 minutes on low flame. Add in turmeric powder and mix well.

  • Add in the crumbled idiyappams and sprinkle few drops of water. Add in salt if required. Steam cook on low flame so that the idiyappams turn soft, and the masala gets combined (takes a minute or two). Switch off flame and add the lemon juice. Give a quick stir.
  • Serve warm with Kerala mixture or sev. Enjoy immediately else the mixture will turn soft and may not taste good.


NOTES 
* Grated coconut if added in idiyappam then you can omit adding again. In case, idiyappam is made without adding coconut then you should definitely add grated coconut. I made idiyappams with grated coconut in it so haven't mentioned adding coconut in the recipe. Add when you slide in the crumbled idiyappams.
* You can even garnish with grated coconut at the end like we do when making dhoklas.
* You can use your choice of vegetables when making this upma, but I feel carrots and peas compliments well in the upma. You can even leave out the vegetables too.
* Alter the amount of oil used in sautéing depending on the amount of idiyappam.
* You can add a dash of amchur powder instead of lemon juice. Add in chat masala to make it even more interesting.


Thursday, February 21, 2019

Beef Paratha | Erachi (Meat) Paratha ~ Step by Step Pics

Parathas are always a happy dinner or quick lunch pack at my place for the boys, but to me its like serving an incomplete mealt(though its complete in itself )if you look on the nutritional part. That's because kids don't like any sides with parathas and just enjoy them rolling these up.H is not a big fan of parathas and he definitely needs a side like yogurt or raitha with parathas. Aloo parathas are the commonest one that they love most. Earlier I posted one non veg parathas so far that is using eggs- egg parathas and no other were tried unless I got to try this one.


Beef paratha was introduced to me by my cousin, all credits to L. His wife had prepared this for their dinner and over a casual phone call to him, got to know that he was having beef parathas. Though the call dropped minutes later, the blogger in me arose hinting I had to give beef parathas a try. I tweaked my own version of making the masala and finally made it. Though beef is one of my family favorite,I don't get it home frequently(may be once in two months or so). Then when I got beef, I had this in mind to try out the parathas with beef. And finally I tried out the parathas, kids were mad over them and I had to repeat making again the second time too when I bought beef. All loved it and if you love beef am sure you will love rolling up these parathas for a quick dinner or lunch pack. I made them for dinner and so the pictures were taken at night. The parathas can be had with a dollop of ketch up or just like that. You can even make the filling ahead and refrigerate to prepare the parathas thereafter. Do give this a try !!


Preparation time ~ 20 minutes
Cooking time ~ 25 minutes
Author ~ Julie
Serves ~ 8 parathas
Ingredients
to cook  beef 
beef  200 gms
turmeric powder 1/2 tsp
pepper powder 1/2 tsp
salt

to make masala
onions finely chopped 1 medium sized
shallots/ kunjulli 1 cup sliced
ginger-garlic paste 1 tbsp
green chillies / pachamulakku 2 finely chopped
tomato / thakkali 1 small chopped
chilly powder / mulaku podi 1 tsp
turmeric powder / manjal podi 1/2 tsp
garam masala 1/2 tsp
curry leaves a sprig
oil 2 tbsp
salt to taste

to make parathas
wheat flour 2.5 cups
salt
water
ghee to smear


Method

  • Wash and rinse the cubed beef 3-4 times. Drain all water, add the beef to a cooker with 1/4 cup water, salt, pepper powder and turmeric powder. Cover and cook till done for 4-5 whistles or till done(the cooking time may vary as the beef so keep a watch accordingly).
  • Knead the wheat flour and make a dough like we do for chapathi dough. Keep covered for 20 minutes.
  • To make filling- Heat oil in a pan and add the ginger-garlic paste. Saute till the raw smell goes. Slide in the onions, green chillies, curry leaves and shallots, saute till its translucent.

  • Add in the spices on low flame and saute again till raw smell disappears. Add in the tomato and give a quick toss. Keep the pan covered for tomatoes to get cooked and mushy. Finally add in the minced meat(beef) and mix well. Add salt slightly as needed(be careful as cooked beef already has salt in it). Cook covered for another minute till the spices are blend well with the mixture. switch off flame and leave to cool.

  • To make parathas- Make balls larger than for making a chapathi and roll out a 3 cm large disc. Place about 1- 1.5 tbsp of filling in the center and close by bringing the edges together to the center. Seal and dip in dry flour. Flatten a bit using hands and then roll using rolling pin until the parathas get shape. 

  • Heat a pan and wait till its hot. Transfer the parathas on the pan and cook both sides by flipping. Smear ghee or oil on both sides and serve on  a plate.
  • Repeat the same step for making other parathas similarly. Serve warm.


NOTES
* You can add coriander leaves to the masala. I didn't have it ready at hand and haven't added.
* You can try making the same with minced chicken too to make chicken parathas.
* You can use minced beef instead of cooking and mincing too. I that case directly add to the masala mix and cook covered till done.
* You can even make the filling of the parathas ahead and refrigerate. The parathas can be made instantly thereafter.

Check out this link for more parathas and Indian flat bread recipes here.

Tuesday, February 19, 2019

Agastya Poo Thoran | Agathi Poo(Flowers) Stir Fry

Agastya poo (Agathi) is a body cleansing agent. It reduces the body heat and cure acidity related problems. The botanical name is Sesbania Grandiflora also known as vegetable humming bird, all thanks to google for the info. I was first introduced to this tree in our last stay at Trivandrum. Our good neighbour aunty had this tree in her backyard and she used to give us the flowers to make stir fry. She only taught me to make this stir fry with scrambled egg in it. Both the leaves and flowers are used to make stir fry and soups. I have used only the flowers to make stir fry till now, it has a mild bitter flavors like fenugreek leaves(uluva ela) / methi. Initially I used to prepare the stir fry with scrambled egg but gradually have stopped using egg in the stir fry as we all love the mild bitter flavors. And most of the bitter flavors are reduced with the use of shallots(kunjulli) and grated coconut. The other day I got these fresh flowers here and made this at home. Do try this out if you find some fresh flowers.


Agastya Poo 

Preparation time ~ 10 minutes
Cooking time ~ 15 minutes
Serves ~ 5
Author ~ Julie
Ingredients
agasthya poo(flowers) 20-25
shallots 10 sliced
turmeric powder 1/2 tsp
green chilies 3
grated coconut 1/3 cup
salt to taste
oil 2 tsp
mustard seeds 1/2 tsp


Method

  • Wash the agastya poo under running water and then drain all the water immediately. Chop the agastya poo very fine like we chop cheera(amaranth leaves).


  • Now chop the shallots and green chillies. Keep aside.
  • Heat oil in a pan and add mustard seeds when hot. Wait to crackle and then add curry leaves.
  • Add in the chopped flowers along with shallots and sliced green chillies. Add turmeric powder and mix well.
  • Keep covered for two minutes on low flame. By then the leaves gets wilted, add in salt thereafter else you may end up adding more salt. Add the grated coconut and give a quick mix.
  • Keep it covered for another 3-4 minutes until the flowers get cooked in the steam(don't add any water to cook).
  • Open the lid, dry up any moisture left and serve warm with steamed rice.


NOTES
* Use an egg if it’s very bitter to taste buds. If using add just before finishing the process, scramble and dry up the moisture.
* You can coarsely grin the coconut and add too.

Related posts of leafy greens-
* Chakkakuru Cheera Thoran
* Mathan Ela Thoran
* Cheera Thoran
* Muringa Ela Curry
* Uluva Ela Thoran

KERALA STIR FRY RECIPES


Friday, February 15, 2019

Thumbprint Cookies | Jam Cookies (Step by Step Pics)

Thumbprint cookies or Jam cookies are similar to shortbread cookie dough. The name 'thumbprint' comes from the fact that we use our thumb to make the indentation in the cookie and the indentation  is filled with jam. These are perfect holiday cookies but kids will surely enjoy all time. My kids love them and have been making this quite some time now. They are easy to make and can be refrigerated until bake,that way the cookies don't spread much.These are bite size cookies that are addictive. A mixed jam filling may make it even more interesting and appealing for kids.I had only pineapple jam at home and have used that. Do give this a try and enjoy !!


For more cookie recipes, click here.


Preparation time ~ 10 minutes
Baking time ~ 12 minutes
Serves ~ 18-20 cookies
Author ~ Julie
Ingredients
all purpose flour / maida 1 cup
granulated sugar 1/4 cup + 1tbsp
vanilla extract 1/2 tsp
egg 1 large
unsalted butter 1/2 cup(113 gm)
salt 1/4 tsp
*nuts 3/4 cup
*jam 1/4 cup


Method

  • Dry roast the almonds and cashews in a baking tray or dry roast in a pan.Pulse the nuts after cooling to a coarse powder. Keep aside.

  • In a bowl, add the softened butter. Beat until creamy and add in the granulated  sugar(I powdered and added as the granulated sugar here is more of a crystals than fine granules). Beat again with a wooden spoon, and then add in the egg yolk(reserve the egg white for covering). Beat again the yolk and add in vanilla extract.

  • Finally fold in the flour in batches and make a dough. Now,prepare a cookie tray with parchment paper. Pinch out small portions like a large gooseberry / amla(or weigh 15 g each on scale).Smooth out the rounds and place on tray. If you feel the balls are very sticky and soft,then refrigerate for 15-30 minutes to harden lightly(its better to refrigerate and bake,helps the cookies from spreading much).
  • Beat the reserved egg white lightly. Now dip each ball in egg white and roll in coarsely powdered nuts. Place again on baking tray. Space an inch apart(it doesn't spread much though).
  • Similarly do for all balls. Now using the back of a rounded edge spoon or with your finger, make an indentation in the center to place the jam. Do this for all cookies and you may see that the round balls flatten and the indentation is made.

  • Preheat oven to 350 degrees F or 180 degrees C and then place the tray in the oven to bake.
  • In the meantime, place half a tsp of jam in each indentation of the cookie to fill. Bake in the oven for 12 minutes( mine took only 10 minutes). The cookies may be very soft to touch immediately. Cool on wire rack for 15 minutes and then transfer to wire rack to cool completely before storing. The cookie turns crisp like short bread cookies once it cools. 

NOTES
* Powdering the sugar is optional. You may add granulated as well but I feel powdered gives the soft touch.
* You can use any nuts of your choice like walnuts, pecans, hazelnuts, almonds, cashews. I have used almonds and cashews in the ratio of 2:1.
* You can even use dry shredded coconut to roll the cookies instead of coarsely powdered nuts.
* Use a bright colored jam for better appeal.You can use any jam of your choice. I have used pineapple jam.
* You can leave out the rolled nuts or shredded coconut and just make it plain too.

Monday, February 11, 2019

Strawberry Salsa

Salsa in food refers to a spicy sauce usually prepared with uncooked vegetables like tomato or fruits like mango,strawberry, pineapple, kiwi or pomegranate and chilli peppers, honey, lime and salt. I first tasted salsa once we reached US, those days we tried out all newer recipes unknown to us. Gradually we started liking many recipes that were made in a healthy way by baking and I started trying out many at home. Salsa was one of the simplest dips that you can serve with those fried or baked chips. This is a simple homemade version of salsa made with some fresh strawberries, give this a try with some pretzels or cheese traingles and enjoy !!


Preparation time ~ 15 minutes
Cooking time ~ nil
Serves ~ a small bowl
Author ~ Julie
Ingredients
strawberry 15-20
onion 1/2 of a medium sized
cilantro 1 tbsp
jalapeno pepper or regular chili diced fine 1 tsp
honey 2 tsp
lime juice 1 tsp
salt a pinch


Method

  • Wash and chop the strawberries in small pieces. Finely chop the onion, cilantro and jalapeno pepper. Mix well with a honey,lime juice and a pinch of salt. Keep covered for 15 minutes so that the juices blend well. Serve with pita chips, tortilla chips or any others. I served with homemade roti /chapathi chips,will share the recipe sometime later.


Friday, February 08, 2019

Kozhi Pidi | Rice Dumpling in Curried Chicken (Step by Step Pics)

Many of our traditional recipes are rich in nutrition and are much tastier, healthier and comfortable to tummies. But these days, anyone hardly has any time to prepare a good meal at home. The more you start relying on fast food chains, packed meals, tinned foods- your health is at stake. Its always better to cook a meal once a day atleast to give some rest to your tummies. I hardly encourage my family to eat out and make most of the food at home. There are very less instances when we eat out and its confided to only special occasions or times when am not well or some other emergency situations.The reason being very simple, you hardly know the date of expiry of these food items, there are no ways to know the secret ingredients that they add to make the food more tastier and you never know the oil that they have been cooking is being used for days. I wouldn't say cooking all meals at home will make sure that you are eating all right things but to some extent we definitely know the ingredients that we add in our dishes.


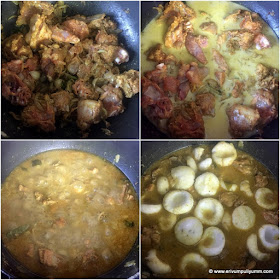
Today's recipe is something very quick to put together and can make a yummy one pot meal at home. I usually make this for dinner as it hardly needs any sides and kids enjoy this a lot. I have been making this since long but never posted here as I always prepare it for dinner. Then the lighting is not so good and I always postpone and think will make it during day to capture some good pictures which never happened. Then finally decided to click pictures this last time when I made so that its up here on blog. Kozhi pidi is a Malabar delicacy and pidiyum kozhiyum is a traditional Christian style recipe. 'Kozhi means chicken and 'pidi ' means rice dumplings; rice dumplings are mixed with chicken curry made with coconut milk. I happened to watch this long back in one of the cookery shows and thought to give this a try. Kozhi Pidi and pidiyum- kozhiyum are similar but in the pidiyum kozhiyum the pidi and kozhi are served separately wheareas in kozhi pidi, both pidi and kozhi are mixed together and served. The Kozhi pidi is spiced with pepper powder and the gravy is thickened with coconut milk. The pidis can be shaped as balls or flat disc shapes. The flat disc shapes cooks easily. This is definitely a must try recipe for Keralites and am sure you will love it !!


Preparation time~ 20 minutes
Cooking time~ 30 minutes
Serves ~ 4
Author ~ Julie
Ingredients
to marinate
chicken  1/2 kg(500 gms)
chilly powder 1 tsp
turmeric powder 1/4 tsp
salt to taste

for masala
shallots 1/2 cup sliced
green chillies 2-3 vertical slit
garam masala 1 tsp
pepper powder/ kurumulakku 1 tbsp
coriander powder /malli podi 1 tbsp
turmeric powder / manjal podi 1/2 tsp
ginger-garlic paste 2 tsp
coconut milk 2nd 2 cups
coconut milk 1 st 1/2 cup
curry leaves 2 sprigs
coconut oil 2 tbsp

for making pidi
roasted rice flour / idiyappam podi 1 cup
grated coconut 3 tbsp
cumin seeds/ jeerakam 1/2 tsp
salt to taste
water 1.5 cups

to temper
shallots sliced 3 tsp
curry leaves a sprig
oil(preferably coconut oil) 1 tbsp
chilly powder 2 tsp


Method

  • Marinate the cleaned chicken with chilly powder,turmeric powder and salt for an hour.
  • Boil water in a pan to make pidis. Switch off flame once it reaches a rolling boil. Take rice flour, add salt,grated coconut, cumin seeds and  mix well. Add the boiled water an make a dough like for making idiyappam. Cover and keep aside.

  • Heat a thick bottomed pan or use a clay pot(mann chatti) and add oil. Add ginger garlic paste ,  Then fry the shallots, green chillies and curry leaves. Saute until the shallots turn golden brown and add powders(turmeric powder, salt, pepper powder, half of the garam masala) on low flame.

  • Add the marinated chicken pieces,mix well and add second coconut milk(2 cups). Simmer and cook this for 15 minutes till chicken is 3/4 th cooked. If the gravy is thickened considerably, add in half cup water, add salt as needed.
  • In the meantime, prepare the pidis. Scoop out small portions like gooseberry size. Make small balls and then flatten the center with thumb and place aside on a plate. Make all flat discs similarly till you finish the dough.

  • Slide the made flat discs in the cooking chicken and give  a quick stir, making sure not to break the pidis. Simmer again for 10 minutes to cook pidis and finally add in thick coconut milk(1/2 cup).

  • Heat oil in another pan and add shallots. Fry till the shallots turns translucent to a light brown shade. Add in the curry leaves and chilly powder, switch off flame immediately. The residual heat is goo enough to warm the chilly powder, mix well and pour over the kozhi pidi. 

  • Keep covered for 3-4 minutes and then serve.


NOTES
* Marinating the chicken is optional but marination helps the spices to seep in the chicken pieces.
* Shallots add a special flavor to the gravy so try using shallots(kunju ulli).
* The spice comes from the green chillies, pepper powder and chilli powder. Adjust as per tolerance. The coconut milk reduces the spices so add accordingly.
* You can even steam cook the pidi separately in a steamer and add to the gravy when its almost done. However, I feel the pidis cooked in the gravy adds more flavor to the pidis.

RELATED POSTS
Paal Pidi


Wednesday, February 06, 2019

Semiya Custard Pudding | Vermicelli Custard Pudding (Step by Step Pics)

Its been many days since I posted a sweet recipe though had been cooking and munching a lot sugar than before. But most of those recipes are already on the blog, this is one sweet hit recipe that you can prepare with the nylon vermicelli or the thin sheer khurma type vermicelli. I bought a pack long time back and was kind of trying to finish it off before the date gets over. This pudding is very easy to put together and takes hardly any time. You can prepare it instantly and set in around 30 minutes unlike all other refrigerated puddings.


I saw this recipe in one of the cookery shows but tweaked my own version of filling to make it much more simpler. They look close to a bird's nest and the filling is a thick custard which you can top with nuts or fruits. The base really sets very good and can be served as an individual piece without any plates. The cover is crisp and sweet with vermicelli,butter and condensed milk.The filling is similar to a cheese cake and both custard and vermicelli together compliments very well. My kids loved them so much that its already lined up to my again do lists. Do give this a try and enjoy !!


Preparation time ~ 10 minutes
Cooking time ~10 minutes
Serves ~ 6 servings
Author ~ Julie
Ingredients
for cover /nest
vermicelli (nylon) 3 cups
*condensed milk 1/3 tin (can use up to 1/2 tin)
butter 2 tbsp
milk 2 tbsp

for filling
milk 1.5 cups
custard powder 3 tbsp
sugar 2-3 tbsp

for topping
pomegranate kernels 3 tbsp


Method

  • In a pan, add butter and vermicelli. Roast the vemicelli until slightly browned and is crisp. Add in the condensed milk and milk (I added milk as 1/3 cup of condensed milk is thick and its hard to combine with that alone. If you use 1/2 tin of condensed milk then there is no need to add milk. The cover was moderately sweet with 1/3 tin condensed milk but you may always use as per sweet tooth). Combine the mixture well until it comes together, switch off flame and leave to cool slightly.

  • Now take a silica mould or a cupcake mould. Divide the mixture in 6 equal portions and place the mixture in each mould in such a way that there is a well in the center and the filling can be placed(see pics for details). Place the mixture when it is still warm so that the mixture can be molded in shape. Refrigerate for 30 minutes.
  • In the same pan or sauce pan, add 1 cup milk to boil. Add in the sugar and mix well. In the remaining 1/2 cup milk, add the custard powder and mix well to remove any lumps. When the milk starts to boil, add in the custard powder mixed milk. Continuously stir this mixture until it thickens. Switch off flame and leave to cool.

  • I removed the made vermicelli cups by sliding a butter knife through one side of the cupcake tray. If you are using silica type moulds its easy to remove. Then add around  2 tbsp of filling or fill with filling. Top with some pomegranate kernels and refrigerate for another hour. Serve chilled.

NOTES
* You can top with some caramelised nuts, roasted nuts or candies or any fruits of your choice. play around and make your own toppings.
* You can use any flavor of custard powder. I have used vanilla custard powder.
* I used only 1/3 tin of condensed milk but you can always go upto 1/2 tin of condensed milk for the cover and you can even use condensed milk for the filling too instead of sugar.
* Try using the thin vermicelli for best results.