Pages

Saturday, July 30, 2022

Cheesy Chicken Bread Omelette | Chicken Bread Omelette

Street food stalls(Thattukada) serve the best bread omelette, and they have their own variations too. Which is your favourite thattukada near your place? What do you like to have most often? 

Bread omelette in itself is very rich and filling. Then how about adding a curried chicken and cheese slice to top it over. Sounds interesting?? Scroll down to check the recipe. The recipe remains very simple and can be made quickly without fancy ingredients. You can even make paneer burji instead of chicken filling and use. The two slice bread with two eggs and chicken filling with melted cheese is so filling and perfect for after school snacks for kids. This is a quick fix snack that you can prepare in no time. Enjoy !!


Preparation time ~ 10 minutes
Cooking time ~ 10 minutes'
Serves ~ 1
Author ~ Julie
Ingredients
for bread omelette
eggs 2
bread 2 slices
curried chicken 2 tbsp
cheese slice 1
pepper powder 1/4 tsp
milk 1 tbsp
Coriander leaves
ghee/ oil 1 tbsp
salt to taste

for curried chicken
boneless chicken, 200 gms
onion  1 medium-sized finely chopped
ginger-garlic paste 1tsp
Tomato 1 chopped
chilly powder 1/2 tsp
coriander powder, 1 tsp
turmeric powder1/4 tsp
garam masala 1/2 tsp
pepper powder 1/4 tsp
Curry leaves
salt to taste 
oil 1tbsp


Watch on YouTube-


Method
CURRIED CHICKEN
  • Heat a pan and add oil. To this, add ginger garlic paste. Then add finely chopped onions. Sauté until translucent and add ginger-garlic paste. Sauté.
  • Then add the spices on low flame and add chopped tomatoes. Cover and cook till tomatoes are mushy.
  • Finally, toss in the cubed chicken pieces. Mix well, add salt and cook covered on low flame for 5-7 minutes.
  • Check if done or add few drops of water, cook covered again 2 minutes. Finally dry up any moisture left and switch off flame. Keep aside to cool.
  • Use left over chicken curry without bones or prepare like the above steps, keep aside.


TO MAKE BREAD OMELETTE
  • Beat the eggs in a bowl, add little milk. Add pepper powder and salt. Beat well.
  • Heat a non-stick pan and add ghee or oil. To this, add the beaten egg mixture in a round shape. 
  • Place two bread slices as in video. Fold the omelette sides over the bread. Then add 2 tbsp of curried chicken on one slice and place a cheese slice on others.
  • Fold the bread slice and .warm up 30 seconds on each side. Serve warm with chutney

NOTES
 * You can make paneer burji and use instead of chicken filling.


RELATED POSTS
Omelette
Sandwiches

Monday, July 25, 2022

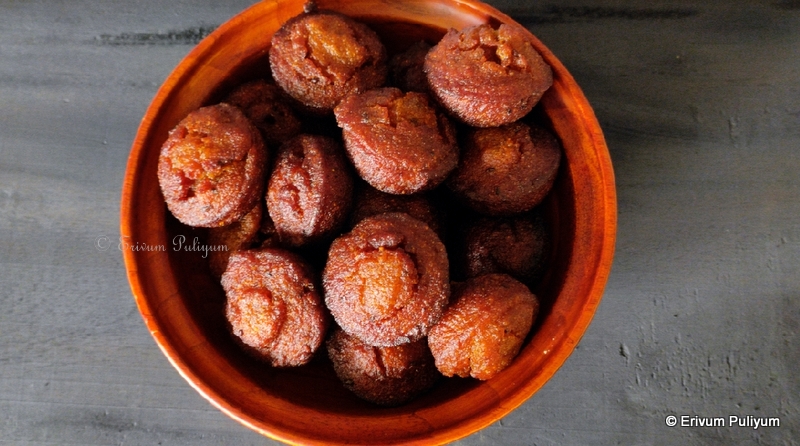
Chakka Unniyappam (2nd Version) | Instant Jackfruit Fritters (No Leavening Agents & No Fermentation)

The traditional unniyappam as we know are made using rice flour, jaggery and palayamkodan or mysore banana. The batter is rested for 6-7 hours to ferment. I have also posted rava-dates unniyappam which is another intersting one, check out here if interested. Now there are instant unniyappams made using baking soda and so unniyappam making is no more fuss. But using baking soda adds to the taste as oil is more absorbed while frying. How about trying something different than the traditional one ? I have tried making unniyappams with rava and dates, which I have posted the link here. 


I have posted chakka unniyappam by adding baking soda but this time I have made an instant version of the same unniyappams using very few basic ingredients available at home. I have not rested the batter more than 10 minutes and I have not used any leavening agents like baking soda, baking powder. The result is soft and delicious unniyappams and the best part is these can be prepared quickly without any resting. I have used puttu podi or coarsely powdered rice powder. I have used store brought packet puttu podi and maida is also added for the softness. The warm jaggery syrup is poured in the flours and a batter of flowing consistency is made. The coarse powder of my puttu podi was more than usual puttu podi (it was like upma rava) so I had to add more water to adjust consistency. Its better to use the less coarse puttu podi for making these unniyappams. Also, as I used the more coarse puttu podi, the unniyappams were very crisp like neyyappam on the outside and soft inside. If you like the crisp outer cover then go ahead and try making with the more coarse puttu podi. Enjoy with black coffee !!


Preparation time ~ 10 minutes
Cooking time ~20 minutes
Author ~ Julie
Serves ~ 20-24 unniyappams
Ingredients
ripe jackfruit bulbs 12-15 paste almost 1 cup
jaggery 3/4-1 cup
coarse rice flour / puttu podi 1 cup
all purpose flour / maida 1/2 cup
dry ginger powder / chukku podi 1/2 tsp
sesame seeds / ellu 1 tsp
cardamom powder / elakka podi 1/2 tsp
water 1 3/4 cup 
salt a pinch

ghee 1 tbsp
coconut bits / thenga kothu 2 tbsp
cumin seeds / jeerakam 1 tsp

WATCH ON YOUTUBE-


 Method 
  • Use 3/4 cup water to melt the jaggery and strain the impurities.
  • Add the puttu podi, maida and salt in a bowl. Add the hot jaggery syrup to this. Mix and keep aside till the mix becomes slightly cold.
  • In the meantime, add ghee. Add the cumin seeds, when this sizzles add the coconut bits. Fry until golden brown. Add to the prepared batter.
  • Add the dry ginger powder(chukku podi), elakka podi(cardamom powder), sesame seeds. 
  • Add the water(1 cup) to adjust the batter consistency. Depending on the coarse texture of puttu podi, reduce or increase the amount of water.
  • Heat a uniyyappam chatti and add oil 3/4 th of each cavity. When the oil is hot, pour spoonful of batter into each cavity almost full.
  • Wait till the bubbles subside a little and the sides of the unniyappam look slightly browned. It may take longer than usual unniyappam to cook as it has ripe jackfruit pulp. Flip the other side and fry again to get even browning.
  • Using a toothpick or fork, remove from oil. Place on paper towels and repeat making the unniyappams till you finish the batter.


NOTES
* I used a mix of idiyaapam podi and puttu podi to get the less coarse texture of puttu podi. Depending on the coarse texture of puttu podi, add idiyaapam podi or make without adding.


Saturday, July 23, 2022

Chicken Bukhari Rice | Arabic Bukhari Rice with Homemade Bukhari Masala

Chicken Bukhari rice is a flavourful and aromatic rice dish which is popular in the Middle Eastern countries and Saudi Arab particularly. Though this recipe is known to be originated from Afghan. In this recipe, there is a special bukhari masala preparation that is the only spice mix added to flavour the rice. Carrot along with chicken is cooked and the chicken is then removed to grill in another pan. Ideally chicken with skin is used so as to give the rice a more richer taste. However, I have used chicken without skin. Also, it is better to use chicken that are largely cut but here I have used chicken for biriyani cut. Chick peas and potato can also be added to the rice. There ois no use of turmeric powder and so the colour of the rice is a light red due to the tomatoes and tomato ketchup. Except for the grilling process, this rice preparation is very simple and any person can make this rice quickly. Enjoy !!


Preparation time ~ 20 minutes
Cooking time ~ 35 -40 minutes
Author ~ Julie
Serves ~ 5-6
Ingredients
basmati rice 2.5 cups aka 500 gms
*chicken 500g
olive oiil 2 tbsp
onion 1 sliced
water 3.5 cups
green chilli 2
carrot 3 julienned
garlic paste 1 tap crushed
tomato pureed / or tomato paste 1 tbsp
tomato ketchup 2 tbsp
clove 2,cardamom 2,jerakam 1 tspcinnamon 1 ,dry lemon 1, bay leaf 5
Salt to taste 

for bukhari masala
whole peppercorns 1 tsp
cardamom pods 4
cumin seeds 1/2 tsp
cloves  4
cinnamon 3 small pieces

for garnish
ghee 1 tbsp
raisin 3 tbsp
blanched, sliced almonds 3 tbsp 

for grill
oil 2 tbsp


WATCH ON YOUTUBE-


 Method
  • Wash and soak the basmati in  enough water. Wash the chicken and drain water,keep aside
  • Heat  a non stick pan with olive oil,add whole garam masala. Add the sliced onion,saute. Then add green chili, julienned carrots. Saute the chicken and fry for 15 minutes.Add in the tomato puree, tomato ketchup, bukhari masala, dry lemon(I used lemon juice) and cook for 15 minutes. The chicken will leave out water so I haven't added any water. The chicken is cooked nice and tender. Remove the chicken on a plate and keep aside.
  • Add water to the masala and bring to a boil. Now, add the soaked rice in and cook covered on medium flame. It may take 10 minutes to cook the rice. Switch off flame and fluff wih a fork.
  • Heat a pan  and add oil for grill. Add the cooked and removed chicken, fry until crisp on all sides by turning. Remove on a plate and keep.
  • In another pan, add ghee. Fry the sliced almonds followed by raisins. Garnish over the cooked rice or use in the serving plate after serving cooked rice and chicken.
  • In a plate, place the cooked rice,add the grilled chicke and finally garnish with fried raisins and almonds.


NOTES
* Chicken is usually bought with skin for this recipe. But I used chicken without skin.
* You can add 1/2 cup cubed potatoes and 1/2 cup boiled chickpeas too in the rice. In that case, you can reduce the carrots. OR just make a vegetarian version using the chickpeas, potato and carrots.


Tuesday, July 19, 2022

Vanilla Cupcakes (Butterless) | Tutty Fruity Cupcakes (No Oven)

Vanilla cupcakes are the first learnt cupcakes by me as mom used to bake these cutees once in a while when she used to bake in her manual oven. Not only that these cupcake tins that I used are the ones she had around 30 years back so I have an emotional attachment too to these. However, much before mom's baking I tasted these cute vanilla cupcakes with tutty fruity topping from Kerala bakeries. 


My grandfather used to bring these vanilla cupcakes from the bakeries whenever we visited our native place and we(me and my cousins) loved munching those cutees. This was not a everyday affair those days and so we still cherish those blessed moments. I still can feel the tasteof those cupcakes. They had tutty fruity topping one or two here and there. And that nostalgia made me add tutty fruity to these cupcakes. You can bake these wiuthout tutty fruity as vanilla cupcakes. The quantity mentioned makes 8-10 small cupcakes but I had only 6 of the cupcake tins and had bigger liners so made a total of 6 small and 2 big muffins. These are very soft, spongy and delicious mini cupcakes made with basic inghredients. These are butterless as well. Don't they look cute ?? This time I baked these on stovetop andI have emntioned the oven temperatures too in notes. But this is for all those who wanted to bake on stovetop. Give these a try and am sure the little ones will surely love these !!


Preparation time ~ 15 minutes
Cooking time ~ 20 minutes
Author ~ Julie
Serves ~ 8-10 muffins
Ingredients
all purpose flour(maida) 3/4 cup
baking powder 1/2 tsp
baking soda 1/4 tsp
salt a pinch
egg 1
powdered sugar 1/2 cup
vanilla essence 3/4 tsp
milk 1/4 cup
oil 1/4 cup
tutty fruity 2 tbsp


Watch on YouTube- 


 Method
  • Sift the flour with baking powder, baking soda and salt twice. Keep aside.
  • Line the cupcake tin with oil and dust with flour. Keep aside.'
  • In another bowl, add the egg and beat until fluffy. To this, add powdered sugar in batches. Add the oil and vanilla extract. 
  • Heat a non stick pan or cooker or any utensil with a tight lid and a small opening for the steam to seep out. If using cooker remaove the weight and use. Place the tray with sand or salt in the pan or cooker. You can just place a plain steel ring too instead of the sand plate. It is not important to add salt or sand but sand or salt keeps the heat uniform and cooks faster. Close the pan with a lid and preheat for 5-7 minutes.
  • Add the flour mix in three batches and add milk to adjust consistency.
  • Add tutty fruity at this point(reserve few for garnish) if using. Mix well.
  • Place the cupcake tin or muffin liners in a plate. Add spoonful of batter in each of cupcake tin upto 2/3 rd full. I used 6 small cupcake tins and two muffin liners. Garnish with remaining tutty fruity.
  • Place the plate with the cupcake tins in the pre heated non stick pan. Cook on high for 5 minutes and then reduce the flame to lowest and cook the muffins for 15-20 minutes or until toothpick inserted in the center comes out clean. (Mine took a total of 22 minutes)
  • Remove from the pan and cool the muffins on a wirerack for 10 minutes and then remove from tins. Enjoy with tea.


NOTES
* If you wish to bake the cupcakes in oven then pre heat oven to 350 degrees Fand bake in pre heated oven for 18-20 minutes.
* Adding tutty fruity is strictly optional.


Saturday, July 16, 2022

Chakka Ottada | Roasted Jackfruit Parcels

Ottada is a traditional Kerala snack made with rice flour, grated coconut and jaggery with some flavourful spices. This is almost sinmikar to elayada but ottada are usually roasted and not steamed unlike elayada. If you personally ask me, which of the two- elayada or ottada ? I would say ottada as I like the crisp outer covering with a soft ada inside.


I have posted the traditional ottada long back in my blogspace long back, the link to which is here. Traditional ottada is cooked in a claypot (eathern ware) but you can always make these on a dosa tawa or nonstick pan. Elayada or ottada is prepared in  banana leaves and is either steamed or roasted. I prepare the steamed chakka appams whenever there is ripe jackfruit bulbs. If you are interested in watching the chakka elayada recipe made with chakka varetti, then the link is here. This time for a change I tried making the chakka ottada which is crispy on the cover and you get to taste the smoky flavors of the banana leaves too. This is a PERFECT snack for all weight watchers, oil free snack hunters and a healthy after school snack too. Try this out if you still get some ripe jackfruit bulbs !


Preparation time ~ 15 minutes
Cooking time ~ 20-25 minutes
Serves ~ 6-7 adas
Author ~ Julie
Ingredients
chakka / ripe jackfruit bulbs 15 -20 that makes cooked chakka 1 cup
roated rice flour / idiyappam podi 1 cup
grated coconut 1/2 cup
jaggery 1/2 cup
dry ginger powder/ chukku podi 1/2 tsp
cumin powder / jeeraka podi 1/2 tsp
salt a pinch

Watch on YouTube-


 Method
  • Add the desseeded jackfruit bulbs in the cooker and add water (1/2 cup). Pressure cook for two whistles.
  • In the meantime, melt the jaggery using 1/4 cup water. 
  • Add the cookred jackfruit in a bowl and add the strained jaggery syrup to this.
  • To this, add grated coconut, rice flour (half of the mentioned), roasted cumin powder and dry ginger powder, salt. Combine all the ingredients and start kneading to a smooth dough.
  • Add the remaining rice flour little by little and make a thick batter (don't add any extra water).
  • The dough shouldn't be very tight nor very loose, else the cooked ada may be very hard if its too tight and if its very loose its hard to spread on the banana leaves.
  • Now take small pieces of clean fresh banana leaves (I have used frozen leaves). Scoop out small portions of the dough. Spread on the leaf using clean hands, or use another piece of a bnana leaf and press on top of thedough and spread evenly, gently pull out the top leaf and fold the prepared ada in half.
  • Similarly, prepare all the other adas till you finish the dough. Stack up the adas and keep aside.
  • Heat a ottada chatti or any iron griddle for 5 minutes on low flame. Place the prepared ada in one layer in the chatti. 
  • You can place weight over the prepared ada for even browning or cover the adas with a lid.
  • Cook for 5-7 minuteson low flame, till the leaves become browned and charred on the underside. Gently flip the other side and cook another 2-3  minutes or till the other side leaves become browned.
  • Transfer the prepared ada to a plate and serve with black coffee or hot piping tea.


NOTES
* You can use aluminium foil to prepare the adas instead of banana leaves.
* You can steam cook the same adas instead of roasting. But I prefer roasted ones.


Thursday, July 14, 2022

Fish Egg Stir Fry | Meen Mutta Thoran | Pananjil (Parinjil) Stir- Fry

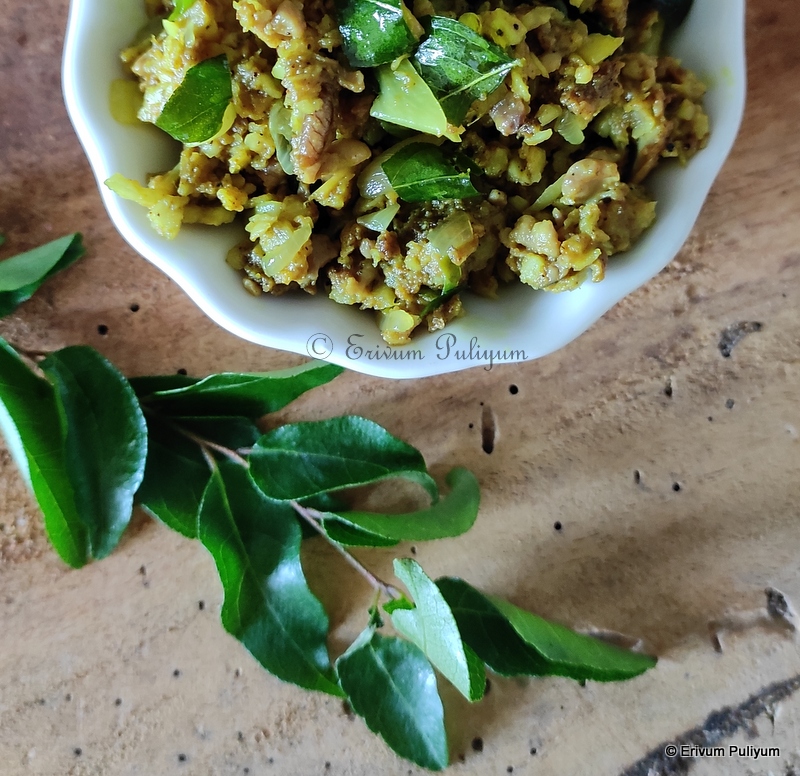
Mom made the best fish egg(meen mutta appams) in banana leaves. This wasn't a routine affair but whenever there was fish eggs available, we always had the mutta appam or mom made fish egg thoran if banana leaves were not available. When I started getting these eggs, I also started preparing the same and kids love it. This would be a small dish as I generally prepare using the fish eggs that we get from the fish available. Very rarely, do I get the big fis eggs from market. But if you get that, the same can be prepared using the same ingredients, just adjusting the measures as per the quantity of fish egg(meen mutta). This is a simple yet delicious stir fry and can be made in no time. Do try and enjoy !!


Preparation time ~ 10 minutes
Cooking time ~ 15 minutes
Author ~  Julie
Serves ~ 2 
Ingredients
mathi mutta (fish egg) 1/2 cup
kunjulli / shallots 2 tsp chopped
veluthulli / garlic 1 tsp chopped
inji / ginger1 tsp chopped
green chillies 1 tsp fine chopped
curry leaves cut
pepper powder 1/2 tsp
turmeric powder 1/2 tsp
grated coconut 3 tbsp
salt to taste
oil 1 tbsp


Method
  • Clean any black portions struck to the fish egg. Wash under running water and drain water.
  • Add the fish egg to a bowl, add sliced shallots, chopped garlic, chopped ginger, chopped green chillies, cut curry leaves, grated coconut. Add pepper powder, turmeric powder and salt. 
  • Mix by crushing the mixture and combine well.
Watch the recipe on YouTube #shorts.
  • Heat oil in a pan and add oil. Add the fish egg mix and give a quick mix.
  • Cover and cook on low flame for 2-3 minutes. Check in between for moisture content, or else add few drops of water or add oil.
  • When the mixture looks cooked, dry off any moisture. Switch off flame and serve warm with steamed rice.
NOTES
* You can use any other fish egg and prepare in the same method.


Thursday, July 07, 2022

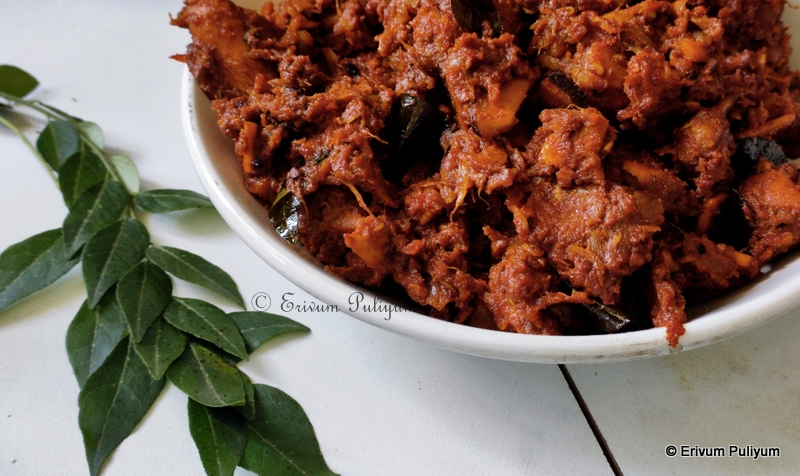
Chicken Peralan | Chicken Perattu | Nadan Kozhi Perattu

It's raining cats and dogs, and I feel to do nothing right now. I feel calm and composed when the nature becomes gloomy and cold. Do you also feel the same in this climate? I feel to watch TV lying on the sofa, wrapped myself with a cozy blanket. Weather really changes moods too, I feel so. Depending on the seasonal changes, our energy levels keep shifting. Isn't it ??

Today's recipe is a chicken recipe, close to the Kerala style chicken roast, which has lots of onions and tomatoes. This is like a close cousin of the same roast but has quite a few differences too. Read more on this recipe below, or watch the recipe on YouTube to learn more. The word 'peralan' or 'perattu' refers to the masala nicely coated or wrapped on the chicken. This is best tasted when it's slow cooked and made on a chullah or adupu / earthen stove. But if you don't have access to an earthen stove or clay stove, then cook on a gas stove but on low flame. Though, you can make this chicken peralan with both boneless and with bones. But I personally feel chicken with bones tastes better for this recipe. There is no need to add any water in the recipe and must be slow cooked so that the water from the chicken is good enough to cook the masala. The onion tomato masala gets nicely cooked and blended to the chicken pieces. The last few minutes of cooking on high flame is to alleviate the flavours to the next level. Chicken Peralan can be served with chapathis, steamed rice, pathiris or even appams. Try and enjoy !!


Watch on YouTube -


Preparation time ~ 15 minutes
Cooking time ~ 30-45 minutes
Serves ~ 6-7
Author ~ Julie
Ingredients
chicken (with bones)1 kg
onion 1 large sliced
shallots 1.5 cups sliced
green chillies 3 vertical slit
tomato 2 medium-sized chopped
coconut sliced (thenga kothu) 2tbsp
ginger-garlic paste 2 tbsp
kashmiri chilli powder 3 tbsp
hot chilli powder, 1 tsp
coriander powder 2 tbsp
garam masala 1 tsp
fennel powder/ perinjeerakam podi 1/2 tsp
peppercorns 1 tbsp crushed
salt to taste
oil 3 tbsp
curry leaves 2 sprigs


Method
  • Wash and clean the chicken pieces under running water. Drain water and keep aside.
  • Keep all the listed spices ready. Cut all the vegetables and keep aside.
  • In a kadai or wok or an anodized pan, add oil (3 tbsp). To this, add the coconut slices and fry till lightly browned
  • Then add ginger-garlic paste and fry till raw smell disappears. Toss in the sliced onions and sauté with a little salt. When the onions are lightly wilted and cooked halfway through, add the sliced shallots. Cook till the onions are lightly browned.
  • Add turmeric powder and mix. Then add in all the spice powders EXCEPT crushed peppercorns one by one and mix. Sauté on low flame and add chopped tomatoes. Add 1/4 cup water to prevent the spices from burning.
  • Add the chicken pieces and give a quick mix to coat the spices well. Adjust salt. Cover and cook on low flame for 5-7 minutes. Don't add any water, as chicken gets cooked from the water from the chicken.This is a very slow-cooked process and that brings out the real authentic flavours, don't rush.
  • After the initial 10 minutes, check salt and add more if needed.Then, cook covered again. The chicken gets cooked in the water given out from the chicken. Check in between for water content and avoid burning. It took almost 15-18 minutes, till the moisture had completely evaporated and chicken was cooked nice and tender. 
  • Then, add coconut oil (2 tbsp) and crushed peppercorns. Add more curry leaves. Give a quick mix. Put the flame on high and fry the chicken masala by stirring continuously to get the charred look. (Adding more oil and sautéing on high is an optional-added step to get more taste, takes about 3-4 minutes). But if you prefer a low oil version, omit adding the last coconut oil, continue with the rest of the steps and finish off. Oil starts oozing from the sides of the pan at this stage. Switch off flame at this point.
  • Serve warm with pathiris, idiyappam, chapathis or even steamed rice. Tastes yumm !!


NOTES
*Though, you can make this chicken recipe with both boneless and with bones. But I personally feel chicken with bones tastes better for this recipe.
* If you don't have shallots, then go ahead and add onions sliced (1 big one) for the same quantity of shallots. Also, add a pinch of sugar too as shallots have a natural sweetness so to balance that.
* Adding coconut slices is truly optional, but we like that extra crunch in between.
* Use a kadai or wok or an anodized pan. Don't use a non-stick pan, as the last browning stages can't be achieved in a non-stick pan as non-stick pans are not intended for high heat purposes.


Monday, July 04, 2022

Onion Uthappam with Kara Chutney | Traditional Uttappam (YouTube #shorts)

Friends, which is your favourite dosa recipe?? We all have different tastes here at home. Kids love ghee roast, H loves masala dosa and me love uthappams and onion uthappam being my favourite. Though we all have different favourites, but all dosa recipes are welcome in one or the other forms when it is made. So, I keep trying out different dosa varieties.
 
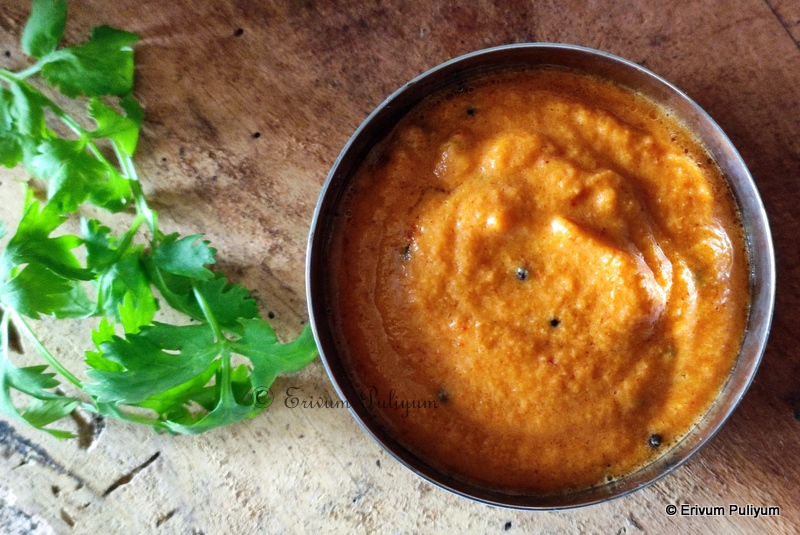
Onion Uthappam, nothing fancy and is a very simple uthappam. The lightly caramelized onion slices in between the dosa batter really brings out the sweet, tasty flavour. I always order onion uthappam if we are eating out at hotels, whereas all others select their favourites. Kara chutney was something new that I tried with onion uthappam, as I always pair uthappam with tomato chutney or kunjulli chutney. The best part of trying out kara chutney is that it gets ready in minutes and everything is added raw, no sautéing. I feel those of you who can enjoy the raw flavours of onions should only give this a try. To us, this chutney was fine, and we didn't much notice the raw favours and totally enjoyed with uthappam. I have shared the Youtube #shorts link of making uthappam. Hope you enjoy and try it out !!


Preparation time ~ 10 minutes
Cooking time ~ 15 minutes
Author ~ Julie
Serves ~ 7-8 uthappam & small bowl chutney 
 Ingredients
for onion uthappam
onion 2 cups fine chopped
coriander leaves, one handful chopped
green chillies 2 fine chopped
salt to taste
gingelly oil 2 tbsp

for kara chutney
coconut grated 1/4 cup
onion 1 medium-sized roughly  chopped
tamarind amla size
dry red chillies 4-5
jaggery, a small piece
salt to taste

for tempering chutney
oil 1 tbsp
curry leaves, a sprig
uzhunnu parippu/ urad dal 1 tsp
mustard seeds 1 tsp


Method
FOR ONION UTHAPPAM
  • Ferment the dosa batter as given in this recipe. Add salt once fermented.
  • Chop the onions, coriander leaves and green chillies. Mix and keep aside.
  • Heat a griddle and add the dosa batter. The batter should be a little looser than idli batter, but not very thin for making uthappam. Don't spread the batter very thin and spread only like making set dosa.
  • Add the chopped veggie mix. Add a tsp of oil on top and press the onions using a spatula.
  • When the sides look cooked, try flipping the uthappam, other side. I personally love flipping the uthappam as I love the caramelized onion flavour. But if you like the onions without caramelizing, then you should put a lid once the uthappam is cooking and remove as soon as the base looks cooked (no need to flip).
  • Serve warm with chutney. We had with kara chutney.


FOR KARA CHUTNEY
  • Add the grated coconut, tamarind, onion, jaggery, salt, dry red chillies and grind to a smooth paste without adding water as onion gives out water.
  • Heat a pan and add oil. Splutter mustard seeds, add urad dal and finally curry leaves. Pour over chutney. 
  • The chutney should be slightly thick for best taste and not watery.


NOTES
* I have already shared the recipe of making idli- dosa batter in a mixer. Here is the link.
* Adding green chillies in uthappam is optional, as few people don't like biting chillies. In that case, omit adding. You can add idli milagu podi.
* Add hot chillies along with kashmiri chilli for more spice. I generally add only dry kashmiri chilli, you can alter as per tastes.
 
RELATED POSTS 
DOSA RECIPES
CHUTNEY RECIPES