Print Friendly and PDF

Wednesday, November 30, 2022

Ragi Dates Malt

Ragi Dates Malt is a super healthy, delicious drink that can be made by grinding whole ragi or ragi flour. I prefer using whole ragi for this process. Ragi is soaked and then ground to a fine paste, strained and the milk is then extracted. Lately I have learnt that millets should be soaked, and the soaked water should be discarded and used, which enhances the absorption of nutrients. I have not used milk in this process as milk hinders the absorption of iron in ragi and dates. You may or may not add milk, replacing the water. I have already shared a panjipullu kurukku or ragi porridge using milk, you can check the link here. If you love the combo of dates and ragi, then give this a try.


Preparation time ~ 10 minutes
Cooking time ~ 15 minutes
Author ~ Julie
Serves ~ 4 Ingredients whole ragi 1/2 cup water 3 - 4 cups dates deseeded 10 cardamom powder 1/2 tsp granulated sugar 1 tbsp almond slices 1 tbsp


You can view the recipe as YouTube #shorts here.
Method
  • Soak the ragi for 4-5 hours, drain the water and add to a blender jar. Grind to a smooth paste and extract the milk by adding water. Grind again till you have only the dark portions of ragi alone left in the strainer, discard that.
  • Add the dates to a blender jar and grind smooth. If using thick dates, then soak and grind. I used soft dates, so didn't soak. Mix this paste to the ragi milk.
  • Heat the mix on low flame, else the bottom mix may thicken faster and get burnt. As it gets cooked, the ragi milk thickens. Add cardamom powder, and granulated sugar towards the end, give a quick stir Serve in glasses and garnish with almond slices.
  • Add the dates to a blender jar and grind smooth. If using thick dates, then soak and grind. I used soft dates, so didn't soak. Mix this paste to the ragi milk.
  • Heat the mix on low flame, else the bottom mix may thicken faster and get burnt. As it gets cooked, the ragi milk thickens. Add cardamom powder, and granulated sugar towards the end, give a quick stir
  • Serve in glasses and garnish with almond slices.


NOTES * I personally don't like adding whole milk to ragi these days because I learnt that the iron absorption from ragi may be hindered if you add more calcium rich milk. Depending on your personal choice, add or delete. * Adding dates enhances again the iron absorption, as dates are a good source of iron. * Add powdered jaggery or sugar, adding a little of these enhances the flavour but it's your wish to omit as there is mild sweetness from dates.
FOR MORE RAGI RECIPES, CHECK THIS LINK HERE.


Friday, November 25, 2022

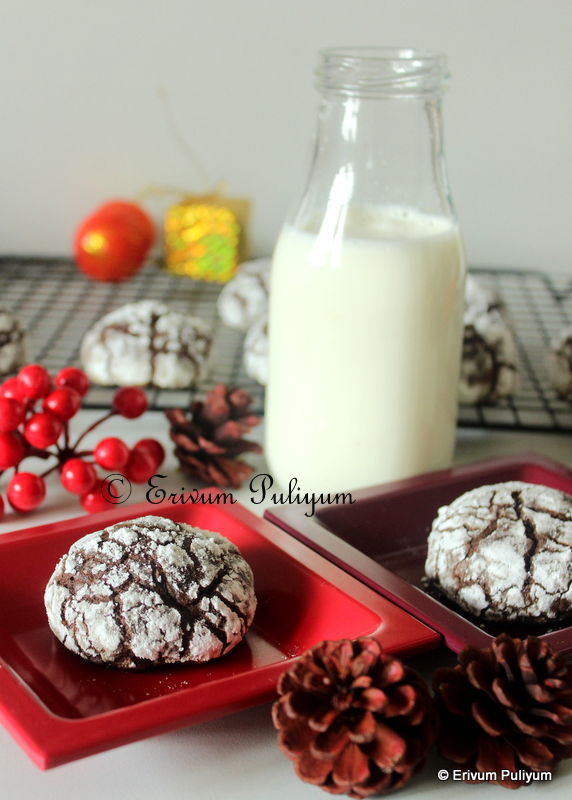
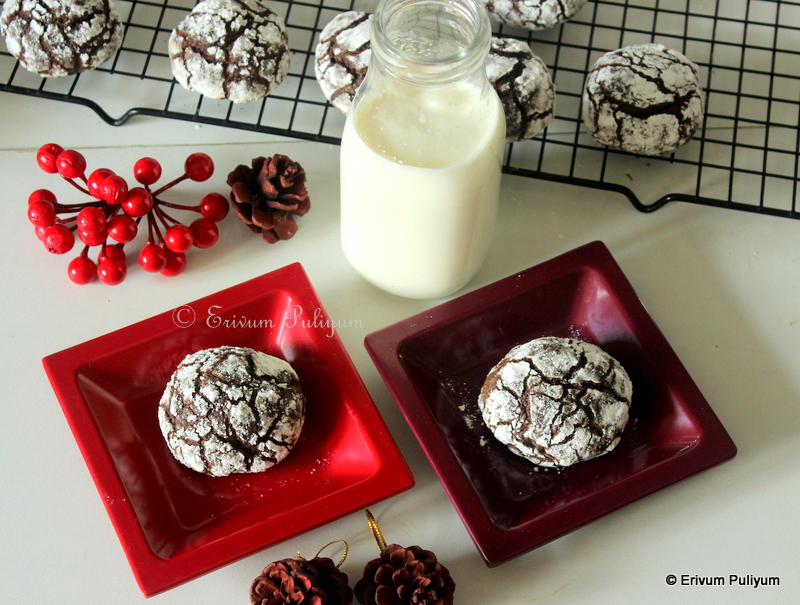
Chocolate Crinkle Cookies

What are your bake plans for this holiday season?  I, have a never ending list of bakes to try each holiday season and I ended up trying one or two from that, rest is all bookmarked forever :D

Chocolate crinkle cookies is one such bake from the list that I tried recently. These cookies are so good to watch them bake as they press down to flatten and take the shape of a crinkle cookie from a ball. The white icing sugar on top adds beauty to the cookie. Kids totally loved these and have already demanded for another batch soon. Do give this a try and enjoy with a cup of warm milk this season.


Preparation time ~ 10 minutes
Baking time ~ 10-12 minutes
Serves ~ 12 large cookies
Author ~ Julie
Ingredients
all-purpose flour (maida) 1 cup (125 g)
cocoa powder 1/2 cup (50 g)
granulated sugar 1 cup
baking powder 1 tsp
salt 1/8 tsp
eggs 2
vanilla extract 1.5 tsp
oil 1/4 cup
icing sugar 1/2 cup (refer notes)

to make icing sugar (1/2 cup)
granulated sugar 1/4 cup
corn flour 1.5 tsp


Watch on YouTube -


 Method
  • Powder the granulated sugar in a blender jar and grind smooth.
  • Add cocoa powder to a bowl, add the powdered sugar. Mix this well. 
  • ICING SUGAR DIY- If you have store brought icing sugar, then forget this step. Otherwise, go ahead and prepare this up to roll the cookies. Add 1/4 cup granulated sugar to the same blender jar and add 1.5 tsp corn flour. Blend until sugar is smoothly powdered. Keep aside till you roll the cookies.
  • In the same blender jar, add the eggs. Blend until smooth. To this, add the vegetable oil and blend again. Add the liquid to the cocoa sugar mix and combine. Add the vanilla extract too. Mix smoothly without lumps.
  • Finally, sift the flour, baking powder and salt over the mix, and you will get a sticky dough. Cover with a cling wrap and refrigerate for 2-3 hours or overnight.
  • Remove, after chilling, roll out small portions of the dough in balls. I got 12 large balls or make 24 small balls. Roll the made balls in the prepared icing sugar and keep on a tray lined with parchment paper.
  • Preheat oven to 350 degrees F/ 180 degrees C for 10 minutes. Place the tray and bake in preheated oven for 10-12 minutes. The cookies are soft just after bake, so cool in the pan for 10 minutes and then transfer to a wire rack to cool completely. 
  • Enjoy with a cup of warm milk, or store in airtight containers till use.
                                                     

NOTES
* Depending on the oven temperatures, keep a close watch on the oven temperatures to prevent burning.
* I added 3/4 granulated sugar to make these cookies, but you can go up to 1 cup of granulated sugar.


Tuesday, November 15, 2022

Nutty Bubble Cake

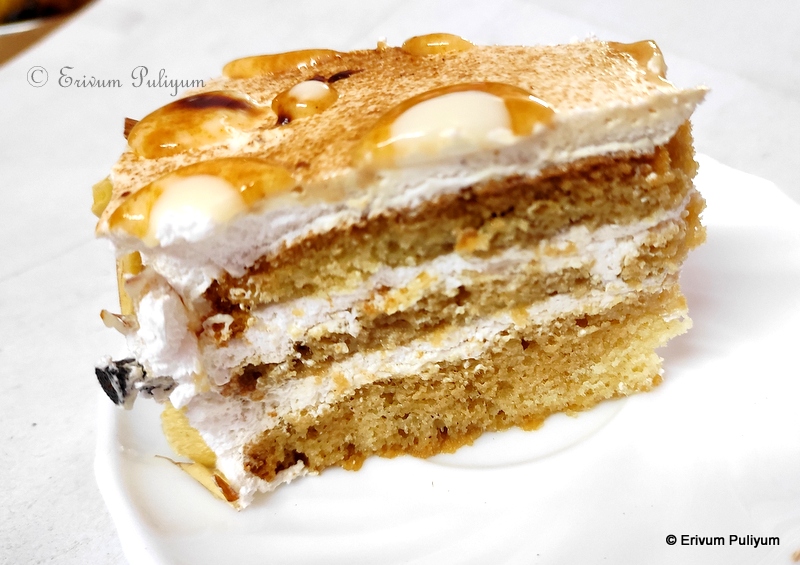
Nutty Bubble Cake is a simple-to-make icing cake using sponge cake, whipping cream, nuts, white chocolate ganache and boost powder. The white chocolate ganache is dropped like bubbles on top and dusted with boost powder that gives the cake the bubble look. 

I prepared the cake from scratch by making a basic vanilla sponge cake. I soaked the cake in boost mixed condensed milk syrup. To this I added whipped cream in the layers and covered the sides of the cake with cashews, almonds and dark chocolate chips. Finally, topped the cake with bubbles made from white chocolate ganache ad dusted with boost powder. The cake is very soft, delicious and melt in mouth. Do give this a try and enjoy !!


Preparation time ~ 30 minutes
Baking time ~ 35 minutes
Author ~ Julie
Serves ~ >1 kg (1200g) cake
Ingredients 
to make sponge
all-purpose flour 1 cup (250 ml)
baking powder 1 tsp
baking soda 1/4 tsp
salt a pinch
powdered sugar 3/4 cup 
vanilla essence 1 tsp
oil 1/4 cup 
eggs 4
milk 1 tbsp

for whipped cream
whipping cream 1.5 cup

to soak
water 1 cup
condensed milk 3tbsp
boost powder 2 tsp

to chocolate ganache
white compound 50 gms
half cream 3 tbsp

for garnish 
cashews 3tbsp
almonds 3 tbsp
dark chocolate chips 3 tbsp


Watch on YouTube -


Method
To make sponge cake
  • Powder the granulated sugar (1/2 cup) to get 3/4th cup. Prepare an 8' tray with parchment paper at the bottom and brush oil on the sides, dust the sides with flour. 
  • In a bowl, sift the maida, baking powder, baking soda and salt twice. Keep aside.
  • In another bowl, beat the eggs until frothy. Add powdered sugar in batches and beat well until pale and creamy.
  • To this add the vanilla extract and oil, give a quick mix. Add the dry ingredients in batches and mix well (don't over mix the batter).
  • Pre-heat oven to 350 degrees F or 180 degrees C for 10 minutes.
  • Pour the batter in prepared tray and place in pre-heated oven. Bake in oven for 30-35 minutes, mine was done in 35 minutes.
  • Remove from oven and cool on a wire rack for 10 minutes and then remove from tray. Cool completely.

To make whipping cream
  • Chill the bowl and blades. Then add the whipping cream to the bowl and beat for 4-5 minutes with a beater. The cream should get stiff peaks and when the bowl is tilted upside down, the cream shouldn't slide down. Cover and refrigerate until use.
To make soaking syrup
  • Boil a cup of water in a pan and add the boost powder. Mix well. To this add the condensed milk. Mix well and keep aside.
To prepare white chocolate ganache
  • Add the chopped white chocolate in a bowl and double boil the chocolate to melt.
  • To this, add the whipping cream and mix well until smooth. Keep aside.


Assembling
  • Cut the cooled sponge cake using a serrated knife in three equal parts.
  • Add a dollop of cream on the board and place the first layer. 
  • Brush the soaking syrup all over the layer. Then pipe the whipping cream using a piping bag or just like that.
  • Add the second layer of cake and brush soaking syrup, add the cream. 
  • Place the final layer and then brush soaking syrup. Add the whipped cream on top and sides to complete the crumb coat. Refrigerate this cake for minimum 30 minutes to 2 hours to set.
  • Finally, add the remaining layer of whipped cream to coat the cake nice and good.
  • Add the cashews, almonds and dark chocolate chips on sides. 
  • In a piping bag, add the white chocolate ganache and cut a small hole. Pipe in small rounds on the top of the cake in different sizes. Finally, dust the cake with boost powder.
  • Pipe in a few smaller bubbles on top of the existing ones to highlight the bubbles a bit.
  • Chill the cake in refrigerator for 1 or 2 hours and enjoy !!!!
NOTES
* I have used a mix of boost powder and condensed milk to make soaking syrup, but you can add whole milk and boost with sugar. I have not added any extra sugar, as condensed milk had sugar.    
* You can use any basic vanilla sponge cake to make this cake if you don't want to try this cake from scratch.


Thursday, November 03, 2022

Bread Pizza Sandwich

Looking for some quick after school snacks??
Pizza flavours are liked by all kids, but making pizza from scratch takes a lot of time. Moreover, pizza base may not be readily available at all times at home.Then, this sandwich becomes a great choice that can be prepared quickly if you have some bread slices. Kids would love to have a snack with pizza flavours and this can be served warm. Do give this a try and enjoy !!


Preparation time ~ 10 minutes
Cooking time ~ 10 minutes
Author ~ Julie
Serves ~ 5 sandwiches
Ingredients 
bread slices 8-10
chopped capsicum 3 tbsp
corn kernels 3 tbsp
black olives 3 tbsp
chopped onion 3tbsp
pizza sauce 3-4 tbsp
pizza seasoning 2 tsp
cheese slices 5
unsalted butter 2 tbsp


Watch on YouTube -


Method
  • Take two bread slices. Apply softened butter on one, then spread pizza sauce.
  • Add a cheese slice and place the toppings one by one-chopped capsicum, chopped onion, black olives and corn kernels. Sprinkle the pizza seasoning on top. 
  • Apply the softened butter on other slice and apply pizza sauce. Cover this slice on top of the toppings.
  • Finally, apply softened butter on the top slice.
  • Heat a non-stick tava and place the prepare sandwich with buttered side down, touching the tava. Press with a spatula to melt the cheese slice and to keep the toppings intact. Apply butter on the top side and flip. Cook this side another 45 seconds. Remove from tava and cut in desired shapes and enjoy.
  • Repeat the same steps of making the sandwich and cook on tava until toasted. 

NOTES
* Buttering the underside of bread before applying pizza sauce is to prevent seepage of pizza sauce in the bread slices and prevents bread soggy.


FEW PIZZA FLAVOURS THAT YOU MAY BE INTERESTED-